Showing posts with label budget. Show all posts

Tuesday, January 3, 2012

Getting Fit On A Budget


Over this last year, we examined several issues concerning the way we lived, the way we ate, and the way we spent our money, and in doing so we have discovered changes that needed to be made in each area.  We tackled the issues one at a time and when felt like we had it in check with our new goals we would move on to the next item on the list.

Well, I'm glad to say we have gotten to the point where we can address our fitness levels. Over the last few years, life has really taken a toll on us.  Our stress level has been maxed out and we have used most of our energy just surviving day today.  Not anymore!  We are taking back our health, in the same manner, we took back our life, our food, and our money.

In order to do this, I need to lose weight and increase my strength, where Racey just needs to maintain his weight and increase his activity level.  How do we plan to do this while still living a frugal life you ask?

This is how:
  • I will follow a low-calorie meal plan eating REAL food.  No diet bars or shakes, no 100 calorie packs, no frozen diet meals, just real whole food.
There are plenty of free online fitness sites that help you track your food, water, exercise, etc. They are easy to join and very user-friendly. I'm using My Fitness Pal if you want to join and be one of my buddies!
  • I will cut back my carbonated drinks to 1 a day and drink more water.
  • I will exercise three to five times a week.
If you have a gym membership that's great, but that doesn't fit into our frugal budget.  Plus, with only one car, I need to find things I can do here at home.  We have very nice mountain bikes we bought several years ago (when we were less broken than we are now) so Racey and I are going to start riding again.  For many years I've wanted to learn to do Yoga, but when I had the time I didn't have the money and vise versa.  Sticking with my frugal goals I found a great online yoga class that is totally free!  At this point, they have over 100 lessons available by the same teacher so I should be good for a while.  Last, but not least, I have two perfectly working feet I can walk with.  I certainly always keep frugality in mind, but I did buy a stability ball to work with as well for under $10.00.
  • I will set trackable goals and make myself accountable for what I do, and take credit for things I don't do!
I have dedicated myself to an online weight-loss challenge.  I have a partner who I support through the challenge and she in return supports me.   In addition, other challenge buddies stop by your blog and comment and share things with you about how their trials and tribulations are going, which is a pretty good support if you ask me. Did I mention that's free too?

As for Racey, he is so happy to have me outside and in a good mood that any activity I come up with he is game for!

This weekend we hiked Kennesaw Mtn. (just over a mile +800 ft. elevation) on Saturday which burned 1213 calories.   Then, on Sunday, we rode our mountain bikes at Blankets Creek in Cherokee County with a calorie burn total of 1025.  All of these are frugal, free activities that don't require a paid membership to something or somewhere.  Besides, would you rather walk on a treadmill while watching TV or see the scenery in these pictures?


This weekend the weather is going to be nice again so I think we will go Geocaching (click the link to find out what Geocaching is all about) up north a little and either hike Kennesaw Mtn. again or find another trail at the bike park.  Needless to say, we will be outside enjoying life!

Hope to see you around!

Tuesday, December 20, 2011

Thrifty Furnishings

Using thrift store treasures to decorate my house is one of the simple pleasures I indulge myself in.  I love walking into a store and having no clue what I will come out with, if anything at all.  It has kinda become a game where I see how well I can decorate my house with thriftiness in mind.

As I walked through my house looking for items to take a picture of to post on the blog, I started noticing that 95% of the items in our home have been bought second hand.  Big ticket items like our beds, living room furniture, kitchen table and cabinet were purchased new, but they are filled with second hand touches.

When we moved into our house it was being repainted and I was asked to choose the colors I wanted for each room.  In doing that I also saw other things I wanted to replace before we moved in.  Like always our budget was almost non-existent! When I started talking with Racey about replacing ceiling fans, light fixtures and the kitchen sink I'm sure he was convinced that I had lost my mind.  I reassured him that I would only do what our budget allowed and that I would be patient enough to find all my goodies at thrift stores, estate sales, Craigslist, ect..

Here is a sampling of some of my finds!


This was a towel rack I bought at Goodwill still in the box!  I just assumed it would extend to the same length as the one I had hanging in the bathroom already.  When it turned up to be to short I decided to make it into a jewelry holder.

Towel Bar - $3.00
  I know you must be tired of seeing this as the back drop of most of the pictures I post on here.  This little treasure was also purchased at Goodwill.  It still had the price tag on the bottom and looked to have never been used.  I'm not sure what it was made to do but it serves as a caddy for all my frequently used kitchen items.  I use the kitchen table as an island when prepping meals and when it's time to eat I just grab the caddy and move it to another location so it frees up the table. 

Caddy - $5.00
 I found these the same day as the caddy pictured above.  They had price stickers on the bottom from Garden Ridge.  The taller one was $19.99 and the shorter was $12.99

They seem to be of the same style and that makes me wonder if they came from the same home. 

I paid $4.54 for the taller one and $2.52 for the shorter.  They still have the price written on the bottom from Goodwill!


This clock was being thrown in the trash because it didn't match the new decor in the teachers lounge of a school I worked at.

Clock - Free


I bought this chandelier off Craigslist as we were preparing to move in our house.

Chandelier - $35.00 


This is the matching ceiling fan.

Fan - $50.00
  

This lamp is another item the school was throwing away.  It gives our kitchen the perfect amount of light when we are having a quit candle light dinner or, if the kitchen is shut down for the night, I still like to have a small light on.  It helps the mood of the house!


This little treasure Racey found on the side of the road!  The people were moving and didn't want it.  He stopped and asked if they were throwing it away could he have it.  They said yes and invited him in to look at the other items they didn't want.  He took all of the things and we sold most of them and bought our sink pictured below!  I think it's meant to be a plant stand but I had McClane and his granddad cut wooden shelves for me to use as a solid surface.


Kitchen Shelves - Free


I found this at Goodwill and thought it could hold my necklaces.  Once home I changed my mind!

$ 1.81


This was a garden planter that I found at Goodwill and re-purposed into a kitchen utensil holder.


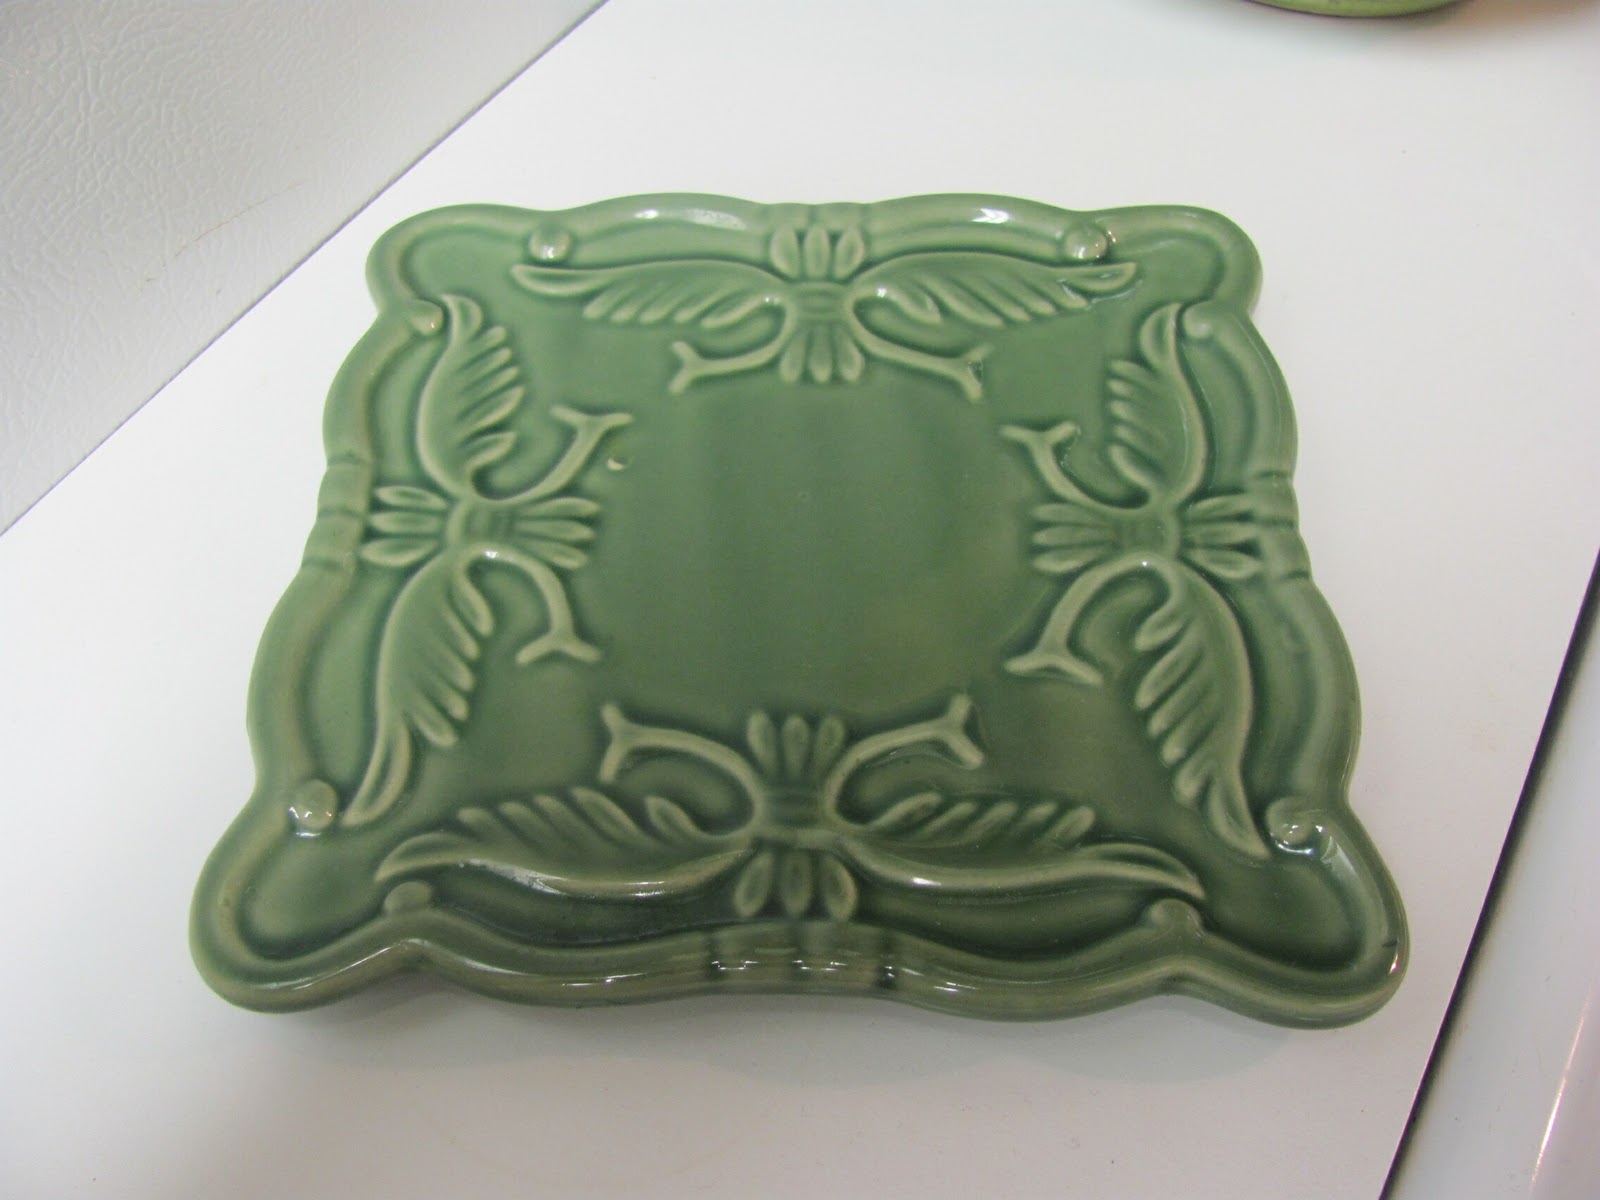
This is a trivet (I think) I like to use it as a spoon rest.
Here are several things from my bathroom.  The toothbrush holder was a pencil holder, the little pink girl at the well is an antique planter, and the hairbrush holder is another planter, who knows what the other dish was made for but as you can see I use it to hold my favorite soap and jewelry.  All these items were found at thrift stores.

Toothbrush holder - $1.51
Hairbrush holder - $1.21
Soap dish - $1.81
Girl at the well - not sure of price


As you can see many of the items that decorate our home have been discarded by others, and that's fine with me

Tuesday, December 13, 2011

Making Thriftiness Work For You

Most people I talk with concerning down sizing and frugality think that in order to live this type of life you must always be doing without.  That assumption couldn't be further from the truth.  Instead, living a frugal, self-sufficient life is simply understanding that it's your job to make most of the things you would normally buy, and source for the most reasonable price possible that which you can't make yourself.  Here are a few examples of things I have made instead of buying when the need arose.

I had three small loaves of homemade bread I knew would not be eaten before they went stale.  Most people would toss the bread into the trash or maybe feed it to the birds, but with a frugal mindset I decided to make bread crumbs.


The two loaves in the back had been tossed into my 'bread crumb bag'  in the freezer that is why they look a little wrinkly!

Take the stale bread, cut it into slices and place directly on the oven rack and toast it.  If you want to really be frugal, toast immediately after cooking something in the oven and you will be able to turn the oven off and toast the bread with the heat from dinner!  After toasted, place in food processor and 'pulse' till crumbs are fine.  Store in an airtight container.  If you want Italian bread crumbs here is the recipe!
Here is the link for step -by-step photo tutorial on making bread crumbs. 

    I have very dry skin and was accustomed to purchasing lotions of every brand in the hopes of finding one that did what the label claimed.  Just the other week I made my first batch of body butter with all-natural ingredients and, to be honest, it's the best stuff I've found!  It moisturizes my skin and leaves it feeling soft even through the next day.  This is one of those times where I did spend money to purchase basic ingredients, but I was able to make a far superior product.
     

    When Layna moved back home this summer she brought several items into the house, one of which was a Paula Dean jar candle.  The candle had only been burned a few times but she was ready to toss it.  Racey and I both love candle light so we eagerly saved it from the Goodwill bin.  After burning the candle all summer and loving the scent, the candles wick decided to move off center and would only burn for a few minutes before the wax would put it out.  Racey first tried to slowly melt the candle in the oven in the attempt to move the wick back to the center, and this did work for a while but the longer we burned it the more the wick gravitated to the side.  Then I had an idea!  As he tried to fix the candle in the oven it filled the house with the scent from the candle and that gave me the idea to use my tart burner to melt the wax and if we couldn't use the candle for light anymore we could at least use it for the lovely sent!

    Here are the ways in which we used our thriftiness on this item:
    • We didn't buy it, we saved it from the trash or Goodwill (people are always throwing or giving things away.  This is a great way to use your thrifty skills and save the landfills!)
    • We used it for our pleasure and entertainment till it couldn't be used anymore (Don't buy or own items that just take up space and bring you no joy, only clutter)
    • We attempted to repair it instead of throwing it in the trash (We didn't pay money for it after all so why not just be rid of it some might be thinking)
    • Once the repair no longer worked we found another use for it as an air-fresher (most items can be re-purposed if you care to save it from the landfill)
    • Once all the sent is gone we will save the wax for other projects we have planned 
    • We will recycle the jar to hold something such as bath salts, foot scrub, etc
     As you can see thriftiness and frugality are not about doing without, but more about resourcefulness and using the products that are already around your home to meet your needs.  Many of us are fooled into thinking that our way of living and consuming will never end or decrease.  In reality though our planet has finite resources and our modern way of consumption will come to an end at some point if our budget doesn't get us first.  

    In fear of being labeled a tree hugger here, I want to leave you with this thought...

    Save yourself the money, save our natural, limited resources, and learn to live as if Wal-mart never opened their doors and you'll be happier for it!

    Saturday, December 3, 2011

    12 Days of Christmas - Teacher Gifts

    December is a frenzied time where students and teachers alike are doing their best to make it to the end of each week and the goal being Christmas Break.  Each teacher usually has a class party where parents bring special foods and gifts, and each grade usually has a special program where the students perform for their parents.  Most parents are scurrying around doing their own Christmas decorating, shopping, and cooking while trying to figure out what type of gift for their child to give to their teacher. All these activities create a very memorable time for the student and parent, but f you have multiple children this can sometimes get expensive and overwhelming.  In my last job, I worked as the head custodian for an elementary school.  This position opened my eyes to the waste and disregard of most of the items that parents bring to their child's school.  Each afternoon I emptied the trash for an entire school with over 1000 students, which makes for a lot of trash!  Every afternoon I would be absolutely amazed and down right irritated to see what some teachers threw in the trash.  Each day my eyes were opened more and my spirit as a gift giving parent was crushed. Some of the gifts would still be in the gift bag, and bag and all would be trashed.  Sometimes others that contained candy or other small stuff would be dumped and they would keep the container.  Most home-baked items were just given to the custodial staff or thrown away. I don't tell you this to burst your bubble, or try to talk you out of buying gifts for your child's teacher. I just want you to be aware of the reality of what I experienced, and if your budget or schedule is tighter than you would like, and these gifts are causing you more stress than joy, then maybe it's time to re-evaluate your gift list.

    A few of my suggestions would be:
    • If you have a strict teacher budget of $10.00 or less then don't buy a gift
    • If you have more than one child and they have multiple teachers (school, sport, piano, dance, church, etc) then don't buy a gift
    • If you or your child feel like there is a bad connection between the teacher and you then don't buy a gift (a gift will not strengthen the relationship)
    • If you are having a hard time buying for your own family, then don't buy a gift
    • If you have to purchase it on a credit card, then don't buy a gift
    Our children's teachers are very important people.  They have a huge impact on what our kids learn, how they react to success, failure, and how they feel about learning in general.  They should be appreciated, respected, and supported, but that doesn't mean you have to buy them a gift.

    Here are a few of my gift replacement suggestions:
    • Donate your time once a month to come in and help the teacher with something in the classroom 
      • Lamaniting special items
      • Cutting items out
      • Grading papers
      • Packing folders
      • Change bulletin boards 
      • Sharpen pencils (kindergarten)
      • Set the room up for the next day
      • Ask her where you can help
    • Support and defend the teacher to your whining child (even if you check matters out later)
    • Write a thank you email and send it to her principal letting them know how much you appreciate the work he/she is doing with your child
    • Save the money you would spend at Christmas, Valentine's and maybe their birthday and give them a nice end of the year gift with a true thank you note ($5-$10 isn't much of a gift at one time but at the end of the year you can purchases a nice $30-$50 gift)
    • Give them a nice fruit & veggie basket.  Even the pickiest of teacher has to eat.
    In my son's 7th grade year his teacher and I didn't see eye to eye at any point in the year.  My son didn't like her because she was a "tough love" teacher, and that just is not his style.  At the end of the year I gave her a thank you note with a gift basket filled with Bath & Body Works items.  My son's relationship was over with this person and I was truly thankful for her assistance dealing with my difficult student.  She sent me an email later that day thanking me for the card and gift and saying how she really appreciated the thank you because it had been a very hard year for her as well, and most parents turn a difficult year into dislike for the teacher.

    If you and your child's teacher are friends, and money is no issue for you then please, gift on!  There is nothing wrong with giving, and obviously not every teacher is as disrespectful as the ones I mentioned above.  It's only when we place ourselves in a stressful situation and put our budget in a hard place to give a token gift that it would be better to not give.  

    This year, take an honest look at where you are financially and what the mood of the holidays at school are and take care of your family first.  Then, if it's appropriate, take care of that special teacher!

    Monday, November 28, 2011

    12 Days of Christmas: Gift #2 - Jewelry


    Today's gift is for the jewelry lover in the family.  This necklace and bracelet combo is for a special night out.  It is made with Swarovski crystals and .925 sterling closures.  It has a simple but classic design.  While it is handmade, it isn't cheap.  The crystals alone were over $100.00, not to mention the sterling silver closures.

    If this is too dressy or out of your price range, here is an example of a necklace, bracelet, and earring set I made for my girls last year.  The total package was under $20.00 and they have had several family members try and buy it off of them!


    If you have someone with long hair that likes to wear it up, this is a great idea!  I call them 'hair sticks' - original I know. ;-)  This item is what got me into jewelry making.  I saw a pair of these in a shop and they wanted $40.00!  I wanted them so bad but I couldn't afford them.  Each time I went back to this store I would look to see if they were still there, and each time the quantity had dwindled.  Racey surprised me one night with a special gift... sure enough my hair sticks!  I was so happy to get them that I started making my own!  Now I have several pair and wear them at some point nearly every day.


    Last, but not least, you can make little trinkets.  I tend to use my leftover jewelry from a project, but you can use anything that suits your fancy.


    I attached a little something to my sewing scissors to help remind people that these are not to be used for anything other than fabric.  Plus, when I hear them jingle and I'm not doing the jingling, I start hollering!  The key chain was a product of me using things up, but each time someone sees it they ask where I bought it.

    So, as you can tell, there are many ideas for homemade gift giving that don't require you to pass on a fruit cake, or have your gift be considered cheap.  It's all about the thought and time you spent in preparing and making the gift that gives it real meaning.

    I hope I have given you a few ideas, and I would love to hear some of the things you are making this season.

    Friday, November 25, 2011

    12 Days of Christmas - Foot Scrub & Body Butter

    In the spirit of Black Friday, I thought I would get a jump on the shopping for this holiday season.  Unlike most Black Friday shoppers I slept in this morning.  Once awake I took my sweet time eating a little leftover Thanksgiving dinner for breakfast.  What?  Everyone doesn't do this?!?  Then I sat at the computer and looked at all the Google news stories about crazy Black Friday shoppers and all their antics.  What some people will do for a discount!  I'm all about saving money but this is just nonsense.  To me this is a prime example of how we have transformed into a consumer society where we are literally possessed with stuff.

    Now don't get me wrong here.  I love things... I love getting gifts... I love giving gifts...I have a wish list as long as my arm as well.  I'm just at a point in my life that each item causes me to think about several things, such as the following:
    • Where was this made?
    • Who made it? (Maybe a child or severely underpaid parent?)    
    • How much fuel did it take to get this item to me here in the States?
    • Could it be made here in the U.S. and, if so, why wasn't it?
    • Is it made of something that could possibly add to my personal toxic load?  If you are unfamiliar with this topic you can read about it here, here, and here
    • Will this item be around and still in good working order in 3 years, 5 years, 10 years?
    • Is this a temporary gadget, and will I be wanting the new and improved one in six months?
    • How long will I or my husband have to work to buy this item?
    As I said I love things, I just hate what it take for me to have them.  So back to my Black Friday plan!  I will still celebrate the holiday as I talked about in a previous post, my main focus will just be on spending time with the people I care about, enjoying a good homemade meal and giving small handmade gift as a token of love.

    Here is my first handmade gift of the season!

     This is for the woman who loves to pamper her feet.  The jar on the left is a powdered foot scrub, and the blue dish is a deep conditioning body butter.  The foot scrub can be made with items in your pantry.  The body butter supplies can be found at any health food store.

    Hear are the steps to make this wonderful, handmade, personalized gift for someone on your gift list!

    Here are the ingredients for the foot scrub:
    • 1/2 cup of  cornmeal
    • 1/2 cup of oatmeal
    • 1/4 cup of seasalt
    • 10 drops of essential oil (I used lemon because that's what I had on hand.  It gave the mixture a clean citrus smell)


    First you will want to put the oats in a food processor or blender and blend into a fine powder.


    Next mix the powdered oats, cornmeal, and salt.  Once all dry ingredients are mixed add essential oil for scent.  This step is optional.


    I used a wide mouth decorative jelly jar that I had left over from the canning season.  If you have a canning funnel it comes in handy for more than canning.


    Here are the ingredients for the body butter:
    • 1 tbsp. of Coconut Oil
    • 2 tbsp. of Shea Butter
    • 2 tsp. of Safflower Oil
    • 2 tsp. of Grapeseed Oil


    Coconut oil is a solid below 76 degrees and becomes a liquid at 77 degrees.  I measured both solids and heated in microwave for 20 seconds till soft but not melted.


    Once softened, place in mixer and SLOWLY add oils.  This step can take a few minutes.  You will want to increase the mixer speed as the oil is incorporated.


    Your final product should look like whipped butter.


    I had a old Avon jar that I found at an estate sale several years ago so I used it to hold the butter.


    Remember that this is a deep conditioning body butter, so a little goes a long way.  Because of the coconut oil it will have an oily feel to it, however, if you use a small amount it will be absorbed into the skin within a few minutes.

    As you can see, this gift is one that is not expensive but is a little more time consuming than just picking up a gift card.  The purpose of this post is to show you that you can give gifts and enjoy the holiday season without becoming a crazy Black Friday causality.  The focus is not money as much as the mentality of the modern gift giver. Tomorrow I will post another homemade gift, so if this one isn't up your alley, check back then and see what you think!

    *Note: The foot scrub is a powder so you will want to put a little in your hand then add a small amount of water to form a paste.


    Tuesday, November 22, 2011

    Homemade Cleaning Products

    We have had several busy days here at our little homestead.  The holiday season is right around the corner and both of my girls are expecting little ones.  McKenna, pictured below, is due in the next month or so.

    This was taken this past Saturday, hard to believe she is 33 weeks in this picture!

    We have been busy washing new little human clothes, putting baby beds together and cleaning the last of the clutter out of 'Coopers' soon to be room.  This past weekend I was talking with a friend of McKenna's, about using coupons and living a frugal, self sufficient life.  She and her new husband have just purchased their first home and are discovering how expensive running a home can be.  I gave her a few tips on how she could cut her budget by  meal planning, couponing, and doing things such as  by making her own cleaning products.  That evening I had her make her very first batch of homemade laundry soap.  She and her husband were so surprised to see how easy and inexpensive it was!


    Here are a few recipes for cleaning products that can be made with basic ingredients most of us have on hand.

    Laundry Detergent

    Ingredients & Supplies:

    • 2 cups of Borax
    • 2 cups Arm & Hammer Washing Soda
    • 1 bar of laundry soap 

     Instructions:
    Grate laundry soap, mix Borax and Washing Soda all together.  Use 2 tbsp. per load.  Please note that this recipe will not foam or suds up.

    Fabric Softener
     
    Soften your clothes without harsh chemicals with this simple alternative. The vinegar will also help to reduce laundry detergent residue on your clothes, a bonus for members of your household with sensitive skin. 
    Ingredients & Supplies:
    • 1 cup white vinegar
    Instructions: Pour vinegar into the laundry rinse cycle (or the fabric softener compartment, if your washing machine has one).


    All Purpose Cleaner 


    Use this to clean, disinfect, and deodorize a variety of surfaces. Use it to wipe down kitchen and bathroom countertops, stovetops, appliances, and more.
    Ingredients & Supplies:
    • 1 cup vinegar
    • 1 cup water
    • spray bottle

    Creamy Scrub "a.k.a. soft scrub"

    Instructions: Mix vinegar and water in a spray bottle. Spray onto surfaces and wipe with a cloth or sponge. Caution: Improperly diluted vinegar can harm certain surfaces. Always test first in a small area if you're unsure.
     
    Use in place of commercial creamy scrubs to clean stained and dirtied surfaces.
    Ingredients & Supplies:
    • 1½ cup baking soda
    • ½ cup water
    • bowl or jar
    Instructions: Mix baking soda and water in the jar (or bowl) to create a paste. Spread paste over surface, and wipe with sponge.

    For stubborn stains, let paste stand for 15 minutes before sponging off.

     
    Soften your clothes without harsh chemicals with this simple alternative. The vinegar will also help to reduce laundry detergent residue on your clothes, a bonus for members of your household with sensitive skin.

    Furniture Polish Recipe

    Ingredients & Supplies:
    • 1 cup olive oil
    • 1/2 cup lemon juice
    • spray bottle
    Instructions: Shake well and apply a small amount to a flannel cleaning rag or cleaning cloth. Spread evenly over furniture surface. Turn cloth to a dry side and polish dry.

    Strong Glass Cleaner Recipe

    Ingredients & Supplies:
    • 1 cup rubbing (isopropyl) alcohol
    • 1 cup water
    • 1 tablespoon clear, non-sudsing ammonia
    • Spray bottle
    • Recycled newspaper to wipe the glass (works better than any paper towel)

    Homemade Glass Cleaner
    Ingredients & Supplies:
    • 1 cup rubbing (isopropyl) alcohol
    • 1 cup water
    • 1 tablespoon white vinegar
    • Spray bottle
    • Recycled newspaper to wipe the glass (works better than any paper towel)

    Granted, it's an admittedly small step in the right direction, but with the state of world affairs over the last several years, anything and everything helps!

    Thursday, November 17, 2011

    Can You Cook Without Eggs, Milk, or Butter?

    Tonight I saw a post of Facebook by one of my friends/family who, by the way, has four children that said   "I have no milk and no cheese!  How do you cook dinner without milk and cheese?"  This gave me such a laugh because I can vividly remember being a young wife and mother and finding myself in the same situation!  Unfortunately for my family, that was before my preparedness skills had been developed.

    Having a well stocked pantry can save you in more ways than one.  If you are like us and you are totally busy all day, everyday, then running out to the store for one or two missing ingredients is just a pain.  Many of you have young children and know quite well how inconvenient it is to load the kids up and drive to the store for one or two things, so much so that you would almost rather do without!  What if you could find a happy medium like something that would save you when you realize that you are missing one essential ingredient, like milk, eggs, or butter?

    I have the answer for you!  It's dehydrated or powdered substitutes.  I know many of you are turning up your nose at the word 'powdered', but please remember we are using it to cook with, not eat as is.  In stocking my pantry for the unexpected, whether it be the loss of a job, an extra high utility bill, or an unforeseen major car repair, etc., these items are worth their weight in gold when I call them into use.


    In my personal research and preparation I came across a company, Shelf Reliance, that sells all the essentials in a long term, shelf stable form which will hold for up to 25 years in most cases!  These items can be costly if you try and use them as everyday essentials, but if they are part of your stockpile or 'back-up' pantry then they are well worth it.  Tonight one of my grown kids turned their nose up at the idea of using powdered milk for their cereal until I told on myself and let them know that I've refilled the milk jug more than once with powdered milk and they didn't even notice!  This is really not my normal MO, but sometimes you just do what you gotta do.  My challenge for you is to look at the staples you use.  If you can find them in a shelf stable version then buy just one of each to begin your stockpile pantry in order to save yourself not only an inconvenient trip to the store, but buy just a little insurance as well.

    Sidenote:  We've mentioned this site on one previous occasion on this blog.  In case you missed it, let us know in advance if you intend to actually purchase something from them.  We have a way to get you a discount on the items beyond the normal prices listed on the site.  And, for full disclosure, we have no affiliation or involvement with this site or anything like that, we just happen to think they have wonderful products that are tough to find elsewhere.

    Tuesday, November 15, 2011

    A Thrifty Kitchen

    I have found that a thrifty kitchen is a busy kitchen!  Not because cooking is so time consuming, but because you begin to realize that half of what you're throwing away could be used in another dish or for another purpose. When you decide to quit buying prepackaged foods and begin cooking from scratch, your time will shift from grocery shopping to meal planning and preparing.

    Here are a few tips I have found to be useful in my kitchen.

    • Have a gallon size freezer bag handy, and as you prepare your meal toss any vegetables left over into the bag and freeze them.  Continue to add veggies to the bag until it's full and use all the "left over" veggies to make a soup.
    • Plan your meals around 'intentional leftovers'.  On Sunday I cooked a ham for dinner, but I planned on using the leftover meat for sandwiches during the week.  By Thursday the meat had been eaten and the only thing left was a nice meaty bone.  On Friday I cooked a big pot of 15 bean soup and used the leftover ham bone for flavoring, and the remaining meat fell off the bone into the soup.  Those are what I call intentional leftovers.
    • Designate one night a week as leftover night.  This usually works well for me on Wednesday or Thursday.  By that time I've cooked several meals and have a little of each in the fridge.  I pull everything out and divide it up according to who likes what the most and will cook just enough of something new to ensure that everyone is full.  
    • Before you toss something in the trash, ask yourself if it could be used for something else.  If you have no idea, ask the Google (sorry, that's a Bush-ism, lol)!  For example, I realized my lemon and orange peals were great for freshening up my garbage disposable.
    • Make your own mixes.  Here are recipes for several I use. (Bisquick, 'Lipton' style onion soup mix, pancake mix, 'Bakers Joy' pan release )
    • When using the oven, try to bake several things at once and freeze the extra.  I cooked two meatloaves the other evening and froze one for dinner another night.  Not only does this save me time, it saves money by not using the gas another night.
    • When making homemade cookie dough, make a double portion and freeze half of the batch another time.
    This isn't an exhaustive list as you can see, it's just a few things that have keep our kitchen going when times were lean.  I would love hearing your personal tips and tricks.  If you're lucky enough to have older ladies in your life, ask them for any tips they might be able to share concerning a thrifty kitchen.

    Friday, November 11, 2011

    Frugal Kung-Fu Part 4

    Take your Sword of Frugality and slice up your food bill so you can eat healthy... affordably!


    Join a Food Co-op!
        Joining a food or farmer co-op of some kind can be a huge benefit and have a solid impact on both the health and budget of your home and family.  If you aren’t a part of one, start searching the internet or asking around for what’s local to you.
    Melissa surfed around a little one afternoon and came across a farmer co-op in our area called Farmer's Market Baskets.  Joining this co-op and getting involved with the community there has literally changed our lives.  We began by volunteering twice a week and our involvement has grown exponentially in a very short time.  I am now their delivery driver and take anywhere from 100-150 baskets of produce to various drop off locations around the area.  Melissa and McClane help me run the route and they also cashier twice a week.  We also recently facilitated the opening of a new location across town to continue to expand and spread the blessings.
    Another great reason to join a local farmer’s co-op is that while it’s not a guarantee, it’s much more likely that you’ll be eating produce grown at least somewhat locally.  While I’m not going to digress into a discussion about peak oil, believe me when I tell you that the days of the 3,000 mile Caesar salad are quickly coming to an end.
     This house is now overflowing with more fresh fruit and vegetables than we can handle.  Each week we end up with enough fruit and veg for three families and it literally costs us nothing except a few hours of our time.  We fight a constant battle to deal with everything we get before it goes bad.  We dehydrate, can and freeze like crazy people and then see that we give the rest away to family, friends, and neighbors who need it.  A couple weeks ago we ended up with nine huge cantaloupes.  Now, we like cantaloupe, but could you eat nine of them before they go bad?  We actually did, but you get the point.
    Obviously not everyone reading this lives in the Kennesaw, GA area, but if you happen to be local, leave a comment with your email address and I’ll get in touch with you about hooking you up with Farmer’s Market Baskets.  You basically get 2-3 times the amount of produce you could get for the same price in the grocery store, or the same amount for half to one-third of the price, however you want to look at it.

    Wednesday, November 9, 2011

    Frugal Kung-Fu Part 3

     If you're reading this series then congratulations!  You've probably already done at least one or two things to improve your Frugal-Fu skills.  Think you're ready to move up the ranks of the frugally minded and really be able to say you're becoming a master of Frugal-Fu?  Meditate on today's lesson about home energy use for a while and you'll certainly be on your way.

    The Household Energy Audit

    If you haven’t done so, perform a household energy audit and look at simple ways you can change what you’re doing to save you money.  Even if you’re not overly concerned about the environment, you’ll be impacting that too.  There are certainly more things you can do than what’s listed here, these are just the things we’ve actually done to our home.


    • Check your water heater temperature.  Many people have theirs set overly high.  Your temperature in general need not be above 165°F.  You can honestly probably be just fine with a temperature of 145°F.  You’ll use either less gas or less electricity.  Also, purchase and install a water heater insulating blanket if your water heater is in a non-environmentally controlled space in your home.  


    • Clean your air ducts.  Your home will both heat and cool more efficiently using less energy, and you’ll be healthier for it by reducing the amount of dust and particles in the air in your home.  

    • Get low flow shower heads if you don’t have them.  Generally a low flow shower head is considered to be anything that runs at 2.5GPM (gallons per minute) or less.  I think this is bogus.  There are great shower heads that run at 1.5GPM or less and have ‘miser’ settings you can use as well.  We have 1.5GPM heads in both of our bathrooms.  Then what I do when I take a shower is get my temperature comfortable, then I push the handle back in so it’s only producing enough flow to keep the shower from kicking back to the bathtub faucet.  Many times I’ll set it to the miser setting on top of that, especially if I’m just standing there shaving.  I’ve measured my usage by getting a gallon pitcher and measuring how long it takes to fill up.  With my method and settings I take a comfortable shower using a truly conservative 0.75GPM.  If you do the math, in a 15-20 minute shower you’ll go from using something like 60 gallons of water on an average 3GPM shower head to just over 10 gallons on a low flow head with the method I described.  Multiply the saved 50 gallons of water times the number of showers you take in a month.  At this rate, and considering one shower each day, you’ll save 1500 gallons a month.  And that’s just one person!  Consider a small family of three saving nearly 5000 gallons of water a month.  That’s certainly enough to lower your water bill.  

    • Take a look at your dishwasher.  This can be an iffy option for most people.  If you’re really pressed for time on a regular basis you probably won’t have time to do all your dishes by hand.  Many dishwashers do recycle their water, but when our older dishwasher went on the fritz we didn’t bother replacing or repairing it.  We now use it to store mason jars and do our dishes by hand and though we haven’t really measured it like we have baths and showers, we feel like we’re saving water and money to use a small amount of water in the sink and a bottle of dish liquid instead of buying dishwasher detergent.  This may or may not work for you but at least consider it.

    • Take a look at your washing machine.  If it’s old and your budget permits, you can get really miserly washing machines that sip the water instead of chug it.  Our older washing machine uses almost 100 gallons of water to do one load.  We don’t have the money to replace it, but we do what we can to limit how much laundry we produce such as using towels to dry off after a shower at least twice.


    This is ours in the backyard
    • Consider your clothes dryer.  At 220 volts, they really suck up the electricity.  So what did we do?  We bought a nice collapsible clothesline and now we hang all our laundry out to dry.  After a month of two of our dryer simply sitting there unused we just gave it away and now we don’t even own a clothes dryer.  You may not be able to go that far, but consider putting up a clothesline of some kind and at least using it when you have time and the weather is nice.  We also got a stand alone laundry rack that stays in the garage to hang the laundry on to dry in the winter when it’s 30° outside and the water in the clothes will freeze instead of drying.  

    • Cooking outside as much as possible is something we do during the summer when it’s really hot out.  We have a charcoal grill as well as a propane stove we use as much as we can because around here it gets so hot in the summer the air conditioner can barely keep up.  Fire up the oven and burners and such in the kitchen and it gets just miserable.  I’ve heard many people complain about this happening in their own homes, and cooking outside is the solution.  Outdoor propane stoves with at least two burners can be had for under $50.   


    • Killing the summer sun and block cold air by applying heat reflective films to your major sun windows.  There are great films out there that don’t tint or darken your light if you prefer to keep your light as well as tinted types that will give you as much or as little shade as you want.  As usual, we didn’t have money for these nice films so you know what I did?  I got flat black paint and literally painted our sliding glass doors until they were covered solid and didn’t let in a single bit of light.  Now that it’s getting to be winter I just took a razor and it all came off perfectly clean in about 15 minutes.  This may not be something you’d do, but around here                                                we get things done however we can, even if it’s a                                                little… odd

    • Get some compact fluorescent or LED bulbs and install them in your most used sockets.  When they first came out, the math didn’t work when comparing cost savings to the cost to purchase the bulb, but that’s changed.  If you look there are coupons out for these types of bulbs now.  Wait for a sale, use a coupon, whatever.  Installing these throughout your home will create a situation where it costs just pennies a month to light your home.  


    • Check the insulation in your attic and crawlspaces throughout your home.  If any of it is missing or seems old and broken down, replace it.  The cost savings here should be obvious.

    • If you don’t have what’s called a ‘pro-vent’ in your attic you should certainly install one.  Lowering the extreme levels of heat in your attic will make your air conditioner run less.  We didn’t have one so we installed one at a total cost of about $200.  This was a tad pricey, but we had the labor done for us so that figure includes the cost of installation.  Regardless, the cost savings over just two summers will certainly pay for the cost of purchase and installation.


    This is by no means an exhaustive list, these are just a few of the things we’ve done ourselves that have noticeably impact our recurring bills.  These tips should also be enough to get you started.  Once you’ve performed the Quality of Life Assessment recommended in the previous Frugal-Fu post and you’ve gone down the list of things suggested in the Home Energy Audit you’ll hopefully be looking at things a little differently and will have no problem finding plenty of additional steps you can take in your own home beyond the things listed here.  So pull out the ninja suit and start killing those utility bills with your mad Frugal-Fu skills!
    Related Posts Plugin for WordPress, Blogger...